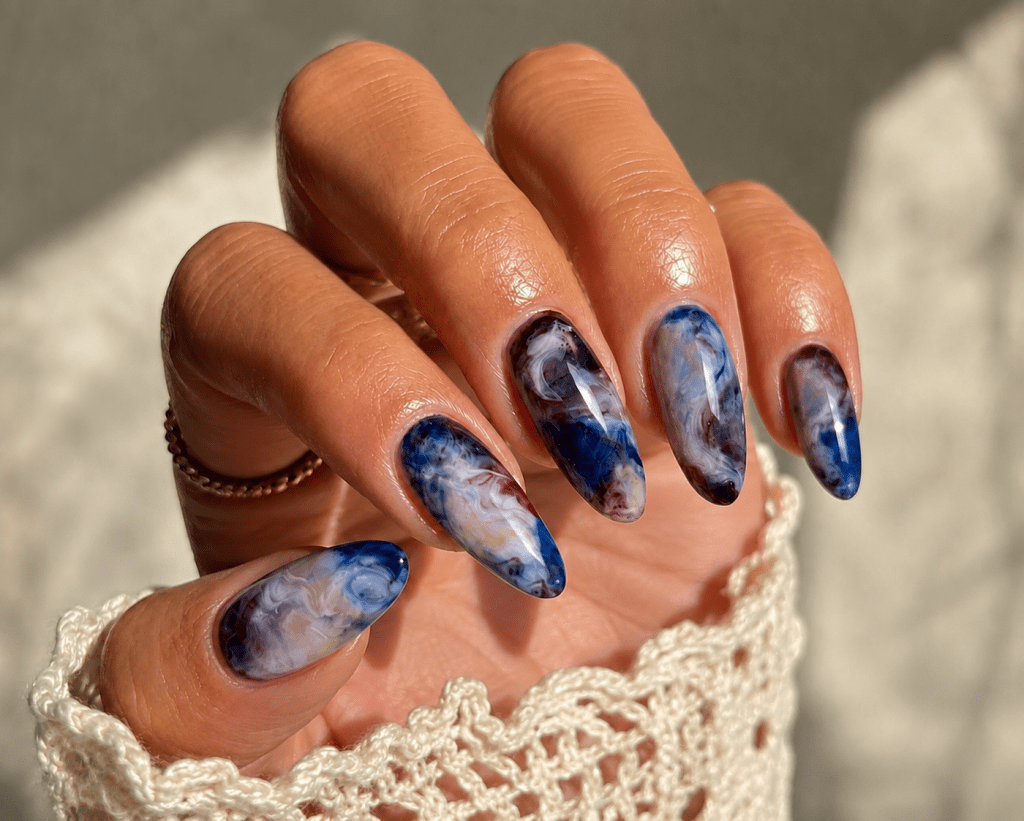
This design is easiest to create using gel polish and blooming gel, which allows the colors to spread into soft, smoky patterns. The result should look slightly unpredictable. That is what creates the natural stone or galaxy-inspired effect.
You’ll only need a few products to recreate this dreamy blue marble manicure at home. From the perfect milky base to blooming gel and fine detail brushes, here are the essentials to achieve the look.
Disclosure: This post contains affiliate links. As an Amazon Associate, I earn from qualifying purchases at no extra cost to you. Thank you for supporting Capsules by Caroline! 💙
What You’ll Need
- Base coat, blooming gel and top coat
- Milky white or sheer nude gel polish
- Dark navy blue, Burgundy and White nail polish
- Optional: light grey-blue or translucent blue gel polish
- Fine nail-art brush or dotting tool
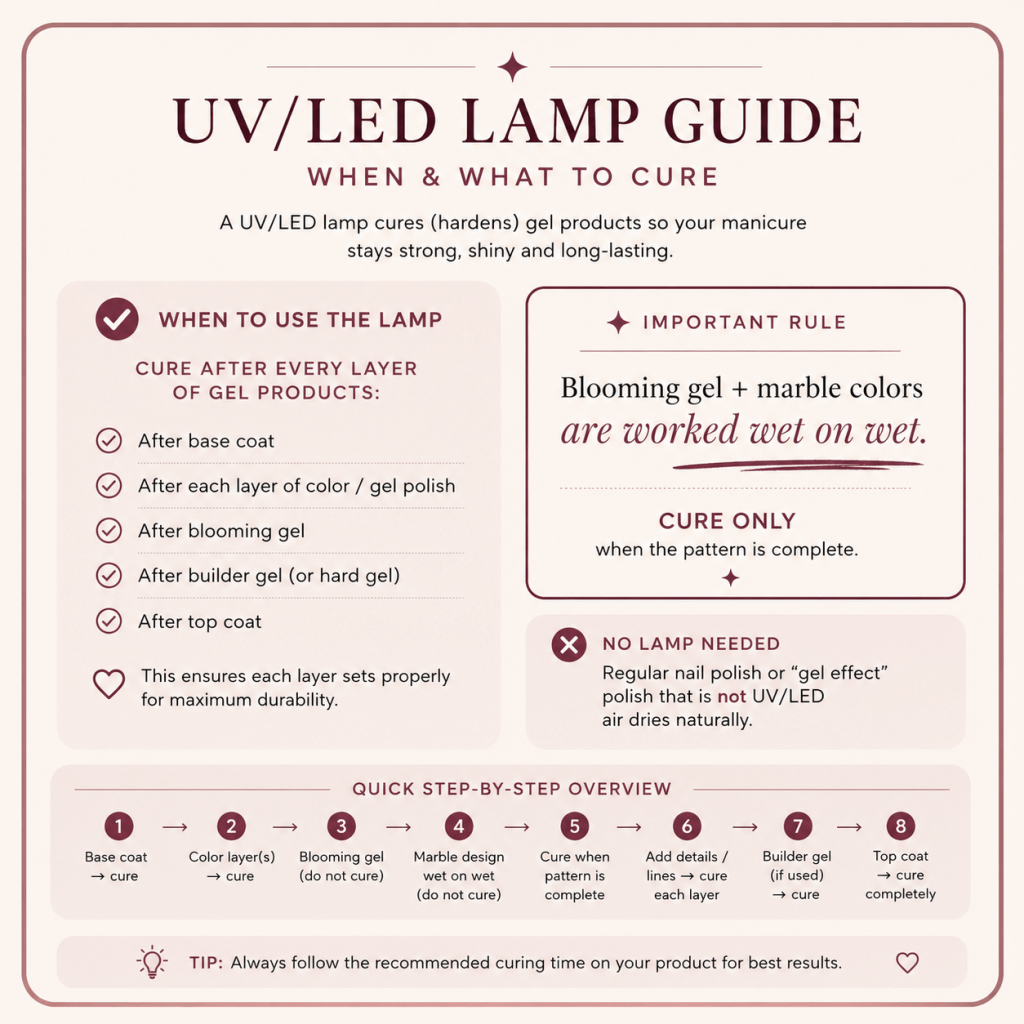
- UV/LED nail lamp (see information below)
- Nail file, buffer and cleanser
How to Create the Look
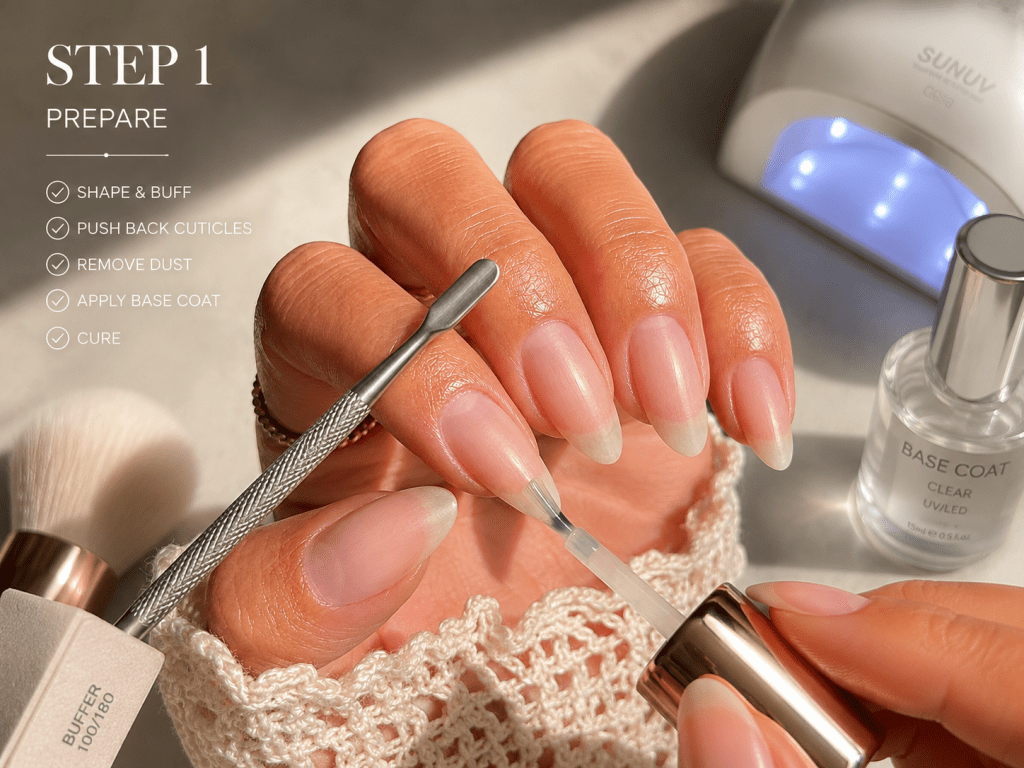
File the nails into an almond or oval shape. Gently push back the cuticles, lightly buff the nail surface and remove all dust and oil. Apply a thin layer of base coat and cure according to the product instructions.
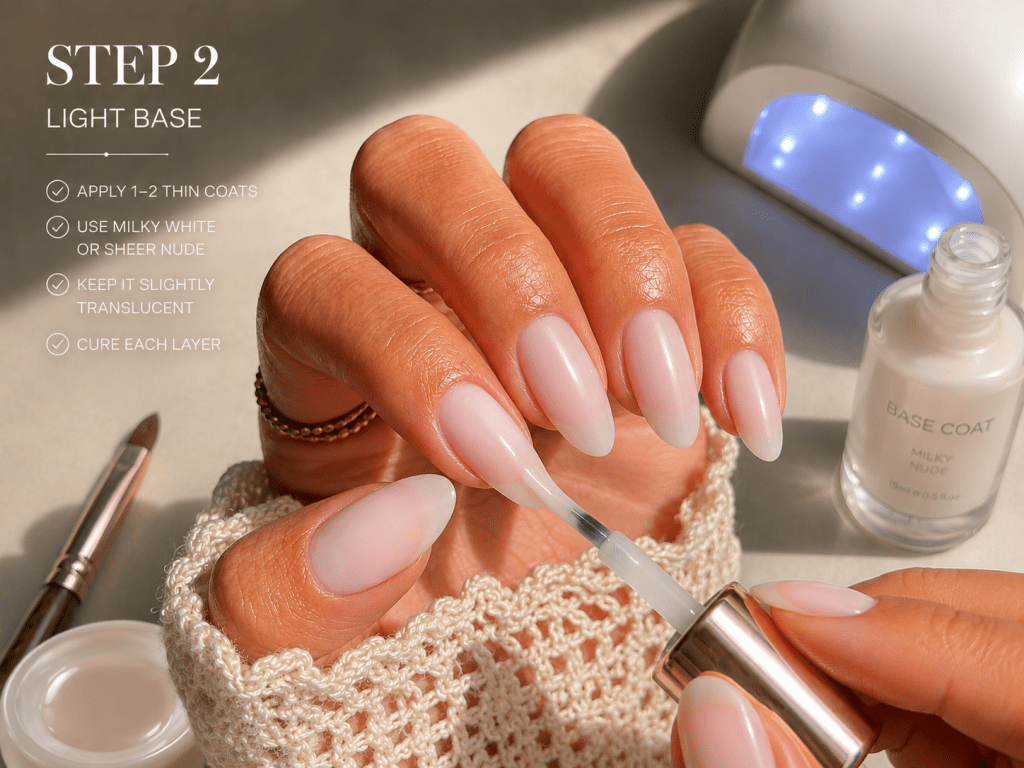
Apply one or two very thin coats of milky white or sheer nude gel polish. Cure each layer. The base should remain slightly translucent to give the finished design more depth.
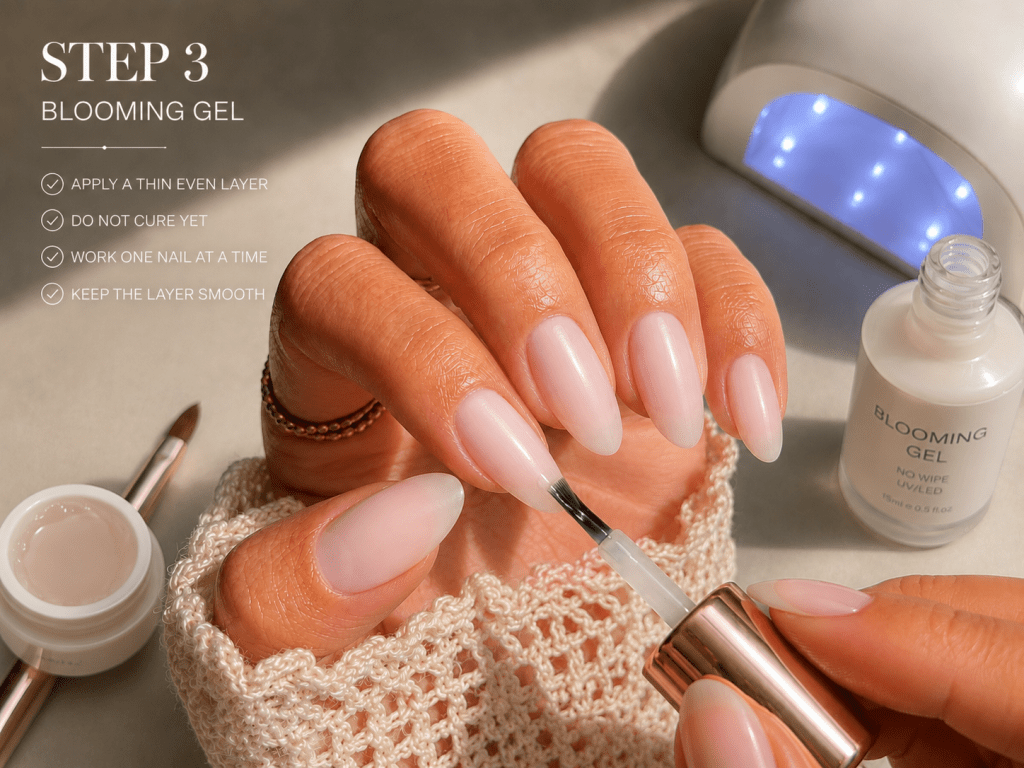
Apply a thin, even layer of blooming gel, but do not cure it yet. Work on one nail at a time. Otherwise, the colors may spread too far before you can control the pattern.
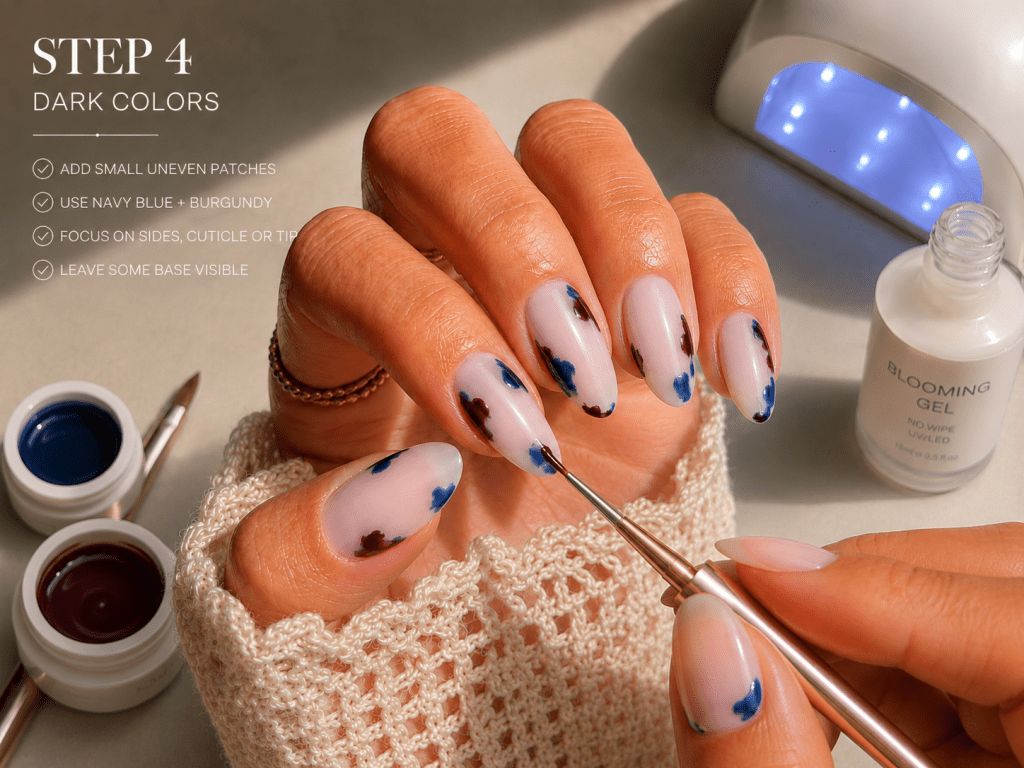
Place small, uneven areas of navy blue and burgundy gel onto the uncured blooming gel. Concentrate the colors around the sides, near the cuticle or towards the tip of the nail. Leave some of the light base visible.
Avoid creating straight lines. Instead, use small curves, dots and short, organic-looking strokes.
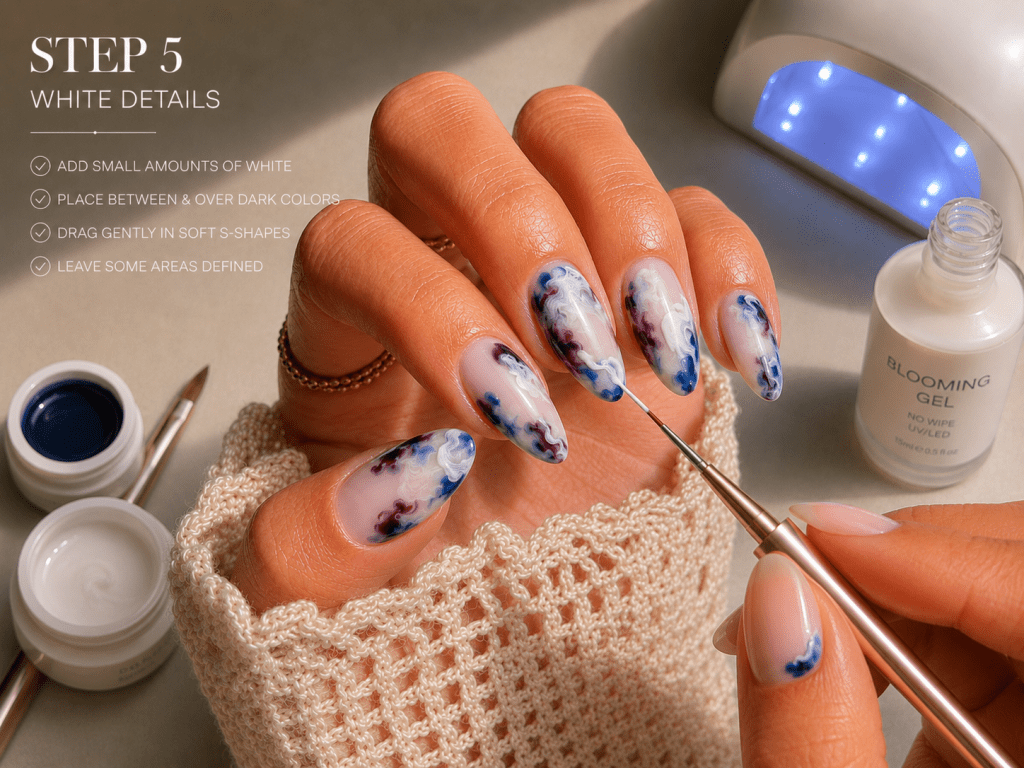
Add small amounts of white gel between and partly over the darker colors. Gently drag your brush through a few areas using soft S-shaped movements.
Do not blend everything together. Some sections should remain more defined, while others should spread softly like ink moving through water.
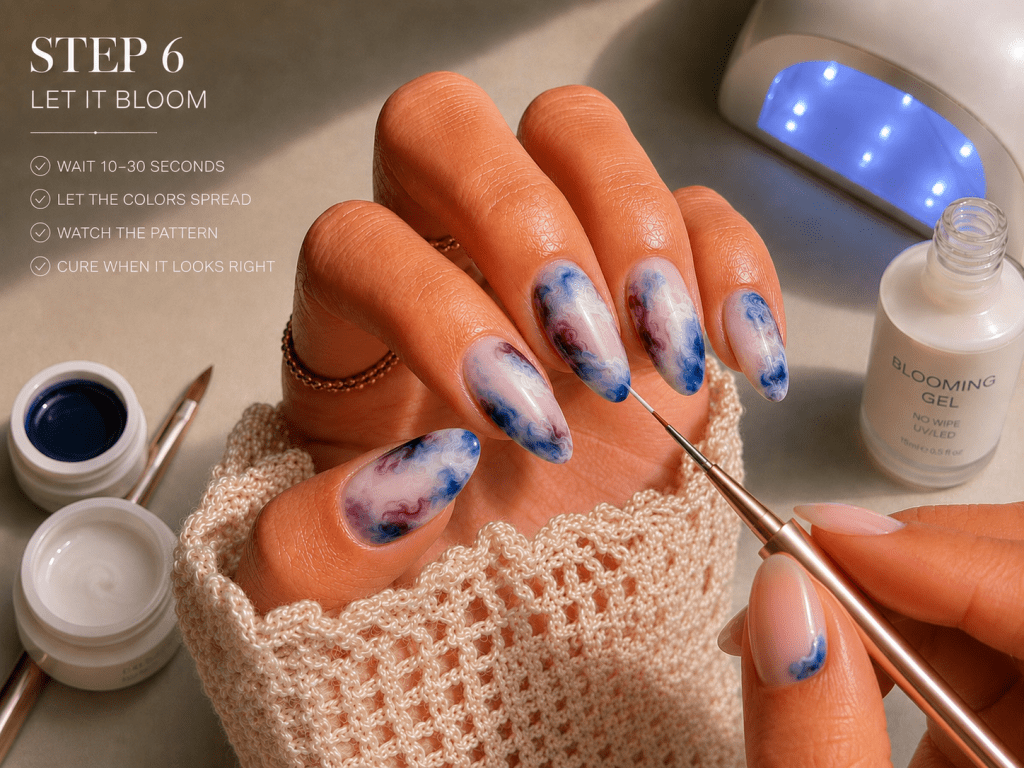
Wait approximately 10 to 30 seconds while the blooming gel spreads the colors. Watch the design carefully. Once the pattern has developed soft, feathered edges, cure the nail.
When the colors spread too much, use less product on the next nail or cure it sooner.
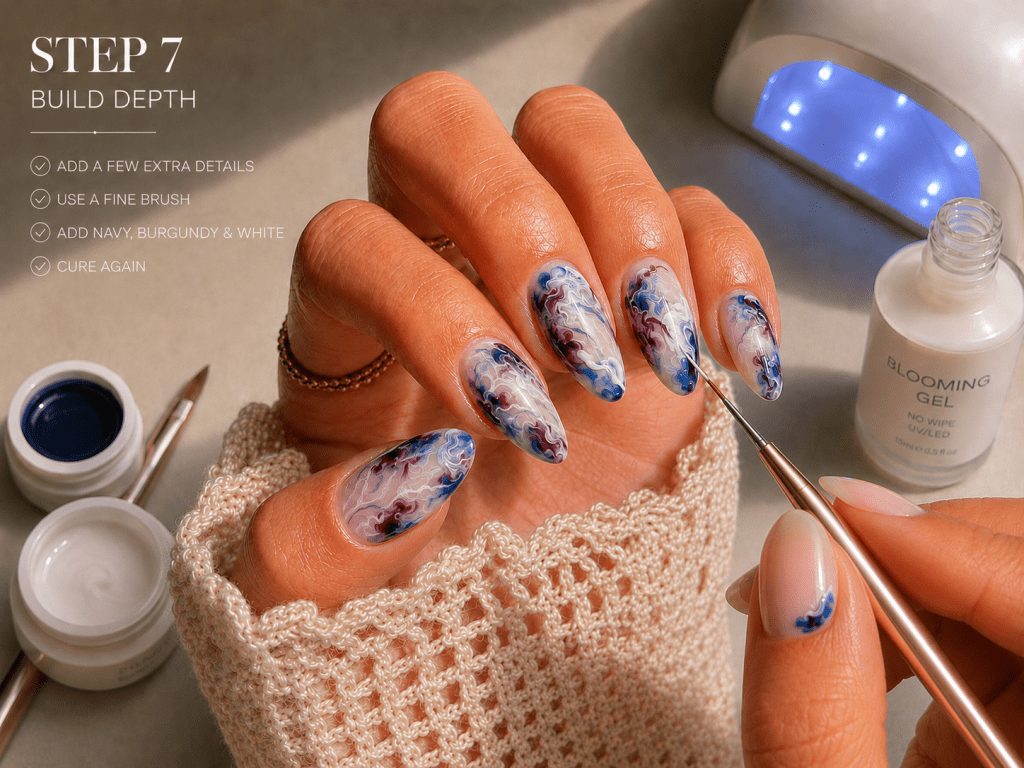
After curing, add a few extra details with a fine nail-art brush:
- A dark navy line around selected edges
- Small burgundy details beneath or between the white clouds
- Fine white veins running through the design
- A little translucent blue over selected areas
Cure the nail again. This layered technique creates the deep, glass-like finish seen in the photograph.
8. Finishing Touches
Apply a thin layer of clear builder gel or a slightly thicker top coat when the surface feels uneven. Allow it to self-level for a few seconds before curing.
To finish, apply glossy top coat over the entire nail and seal the free edge. Cure thoroughly. Remove the sticky layer when required and finish with cuticle oil.
Tips for a More Natural-Looking Result
Create a slightly different pattern on every nail while keeping the same color palette throughout the set. Some nails can feature more blue, while others can contain more burgundy or white.
Leave a few areas almost completely translucent. This creates the fluid, semi-precious stone effect rather than making the design look like solid tie-dye.
Avoid getting uncured gel on the skin. Remove any product from the skin before curing, and use compatible products from the same system whenever possible to reduce the risk of incomplete curing and skin reactions.
Enjoy!


Legg igjen en kommentar